The No. 1 Multivendor
Marketplace for WordPress
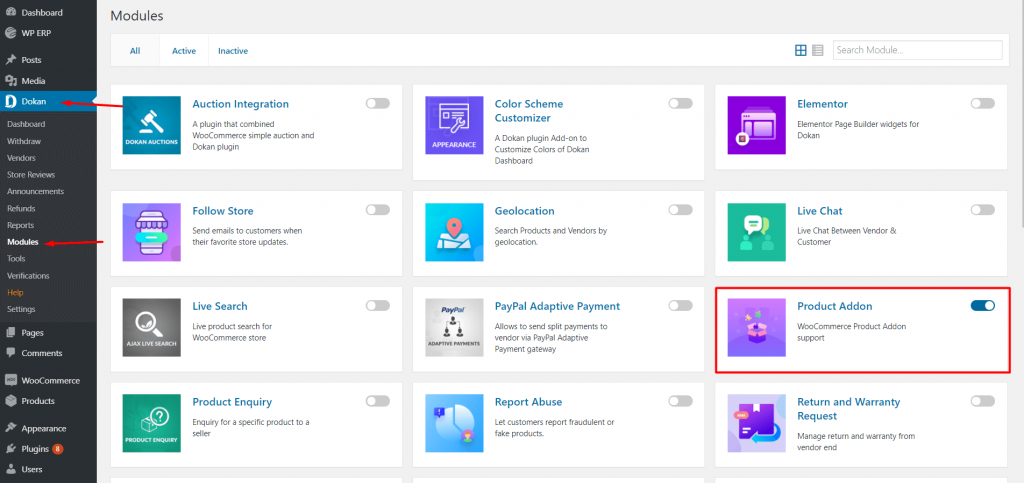
The next task is, go to Wp Admin Dashboard→Dokan→Modules to activate the Product Addon module. Don't forget to activate the WooCoomerce Product Addon extension plugin first.
You will find it under the plugins option from your dashboard.
An addon can be created by the admin and by a vendor.
Using Dokan Product Addon as Admin
An admin can have his own marketplace. So, he can create an addon for his products.
Having said that, to create an addon, you must navigate to WP Admin Dashboard→ Products→ Addon. Click on the button Create New on top of the screen.
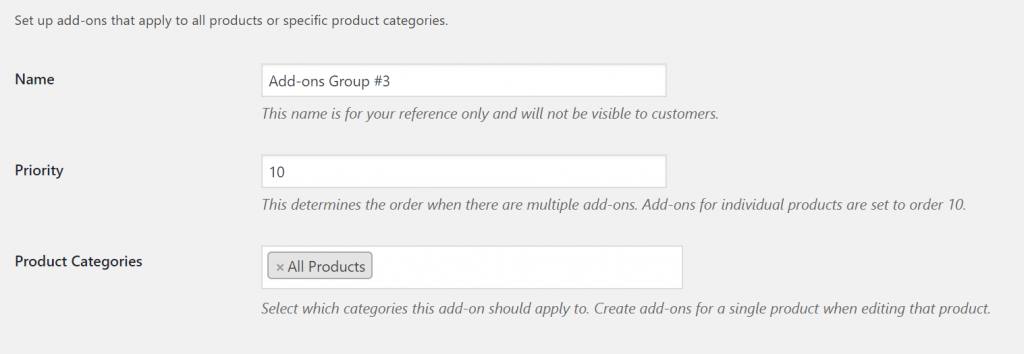
You will notice some fields are opening below the page. You need to add a name for your reference, priority number so that if you have multiple addons then the addon will be displayed according to those numbers.
Also, you need to mention the product category this addon will be applicable to. For example, if you choose All Products, that means the addon will apply to all of your products.
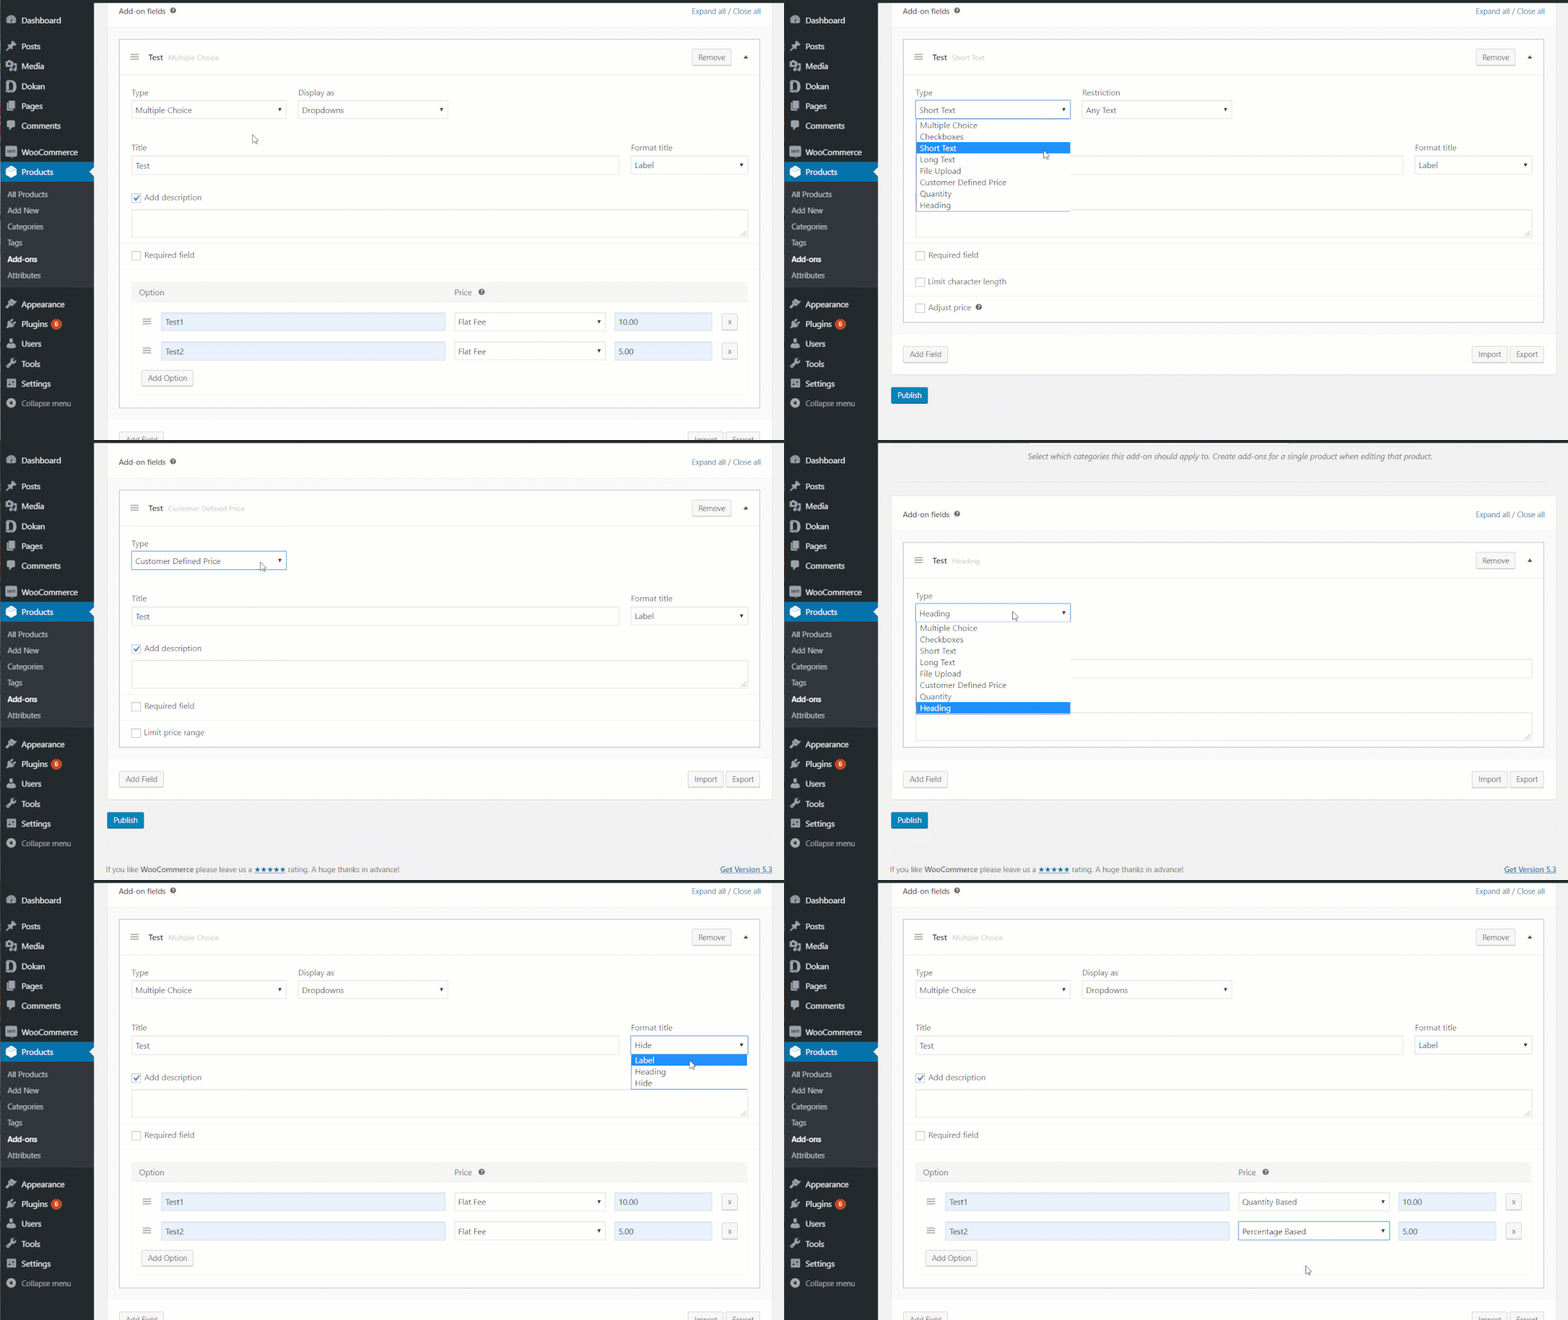
To set the addon, click on the Add Field button located at the bottom. You will have multiple options to set up your addon.
Like the type, display, title and many more. You will have the option to set the addons for a flat fee, quantity-based or percentage-based.
Click on the Publish button to finish.
Yay! you have created your addon. Now, how your customers going to use it?
It is simple when they go to buy a product they will have the options for the addons. When they select an addon, they will be charged according to the charge you have set for that addon.
For example, the addon Test1 will be charged with a flat fee of $8.70. So, when the customer buys a product worth $39.13 and adds Test1 as the addon then they will have to pay ($39.13+$8.70)=$47.83.
Same calculations go for the quantity based and percentage-based addons.
How Could Vendors Utilize Dokan Product Addon
Earlier we have mentioned that vendors can also create add ons. Let us have a look at that.
For a vendor to create an addon, you have to go to the vendor dashboard and click on Settings.
On the next page, there will be a bar named Addons. Click on it. On top of the screen, you will see a button Create New Addon. Hit that button.
You will have the same options as the admin to create your addon.
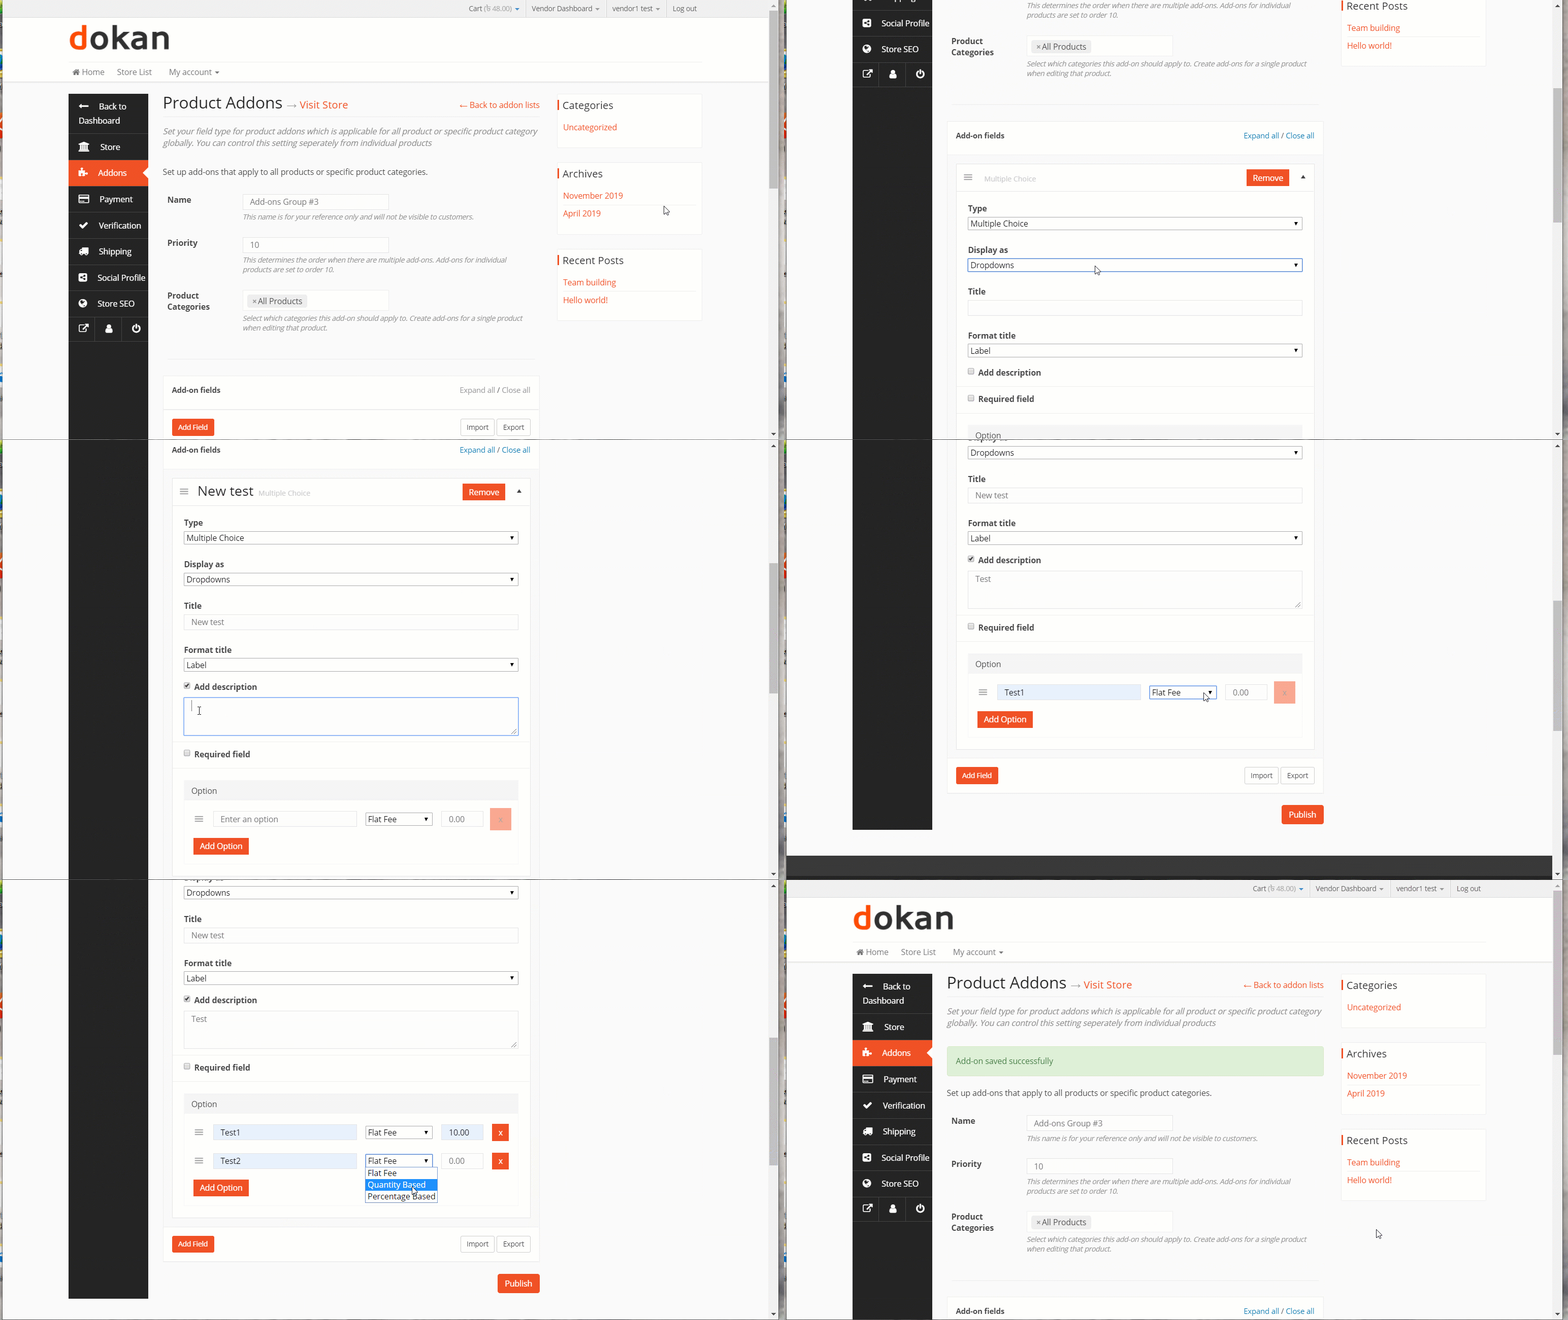
Just click on Publish like the admin to finish creating your addon.
You can create individual addons for individual products. To do that, select a product. If you scroll down you will see a button called Add Field. Click on it to unlock the options for addon creation.
Still, confused? ok, check out this documentation to get a clear idea.
Important Points to Remember
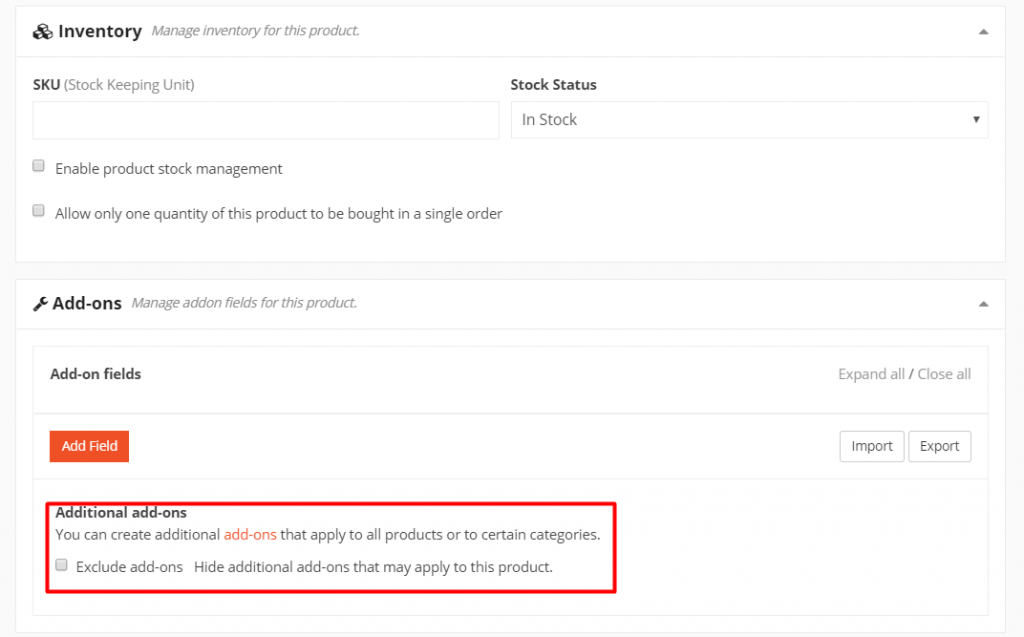
- If you select the Exclude add-ons option then only the addon that was created for that product will be applicable, the global addon will not be applicable
- Otherwise, the global addon will be applicable for that product
- If you create an addon for the individual product but do not select the Exclude add-ons option then the Global and Individual add-on will be applicable
- The admin will be able to view all the addons created by the vendor and him/herself. But the vendors can only view his/her own addons
- Addons will be applicable to the products of the creator of the addon.
Wrapping up on Dokan Product Addon
About 40.000+ marketplace around the world is run by Dokan. With its advanced features, Dokan is gaining more strengths day by day.
